Climaroof – Application Instructions
APPLICATION CONDITIONS
Runoff gradients
Contractors are required to verify runoff gradients (1% minimum gradient) on system application surfaces (using a ruler, water level, laser or other appropriate tool, depending on application difficulty) to eliminate the possibility of still waters.
This, depending on the magnitude of the problem, without performing local runoff gradient adjustments (using appropriate repairing mortar, like Strong Repair 84 or Fine Repair 83, by KRAFT Paints) or/and full application of runoff course**.
Differences of +1cm can be repaired with ClimaRoof® KF-1 mortar. More acute local differences can be rectified using thermal insulation boards of varying thickness.
** by reinforcement cementitious screed, with POWDER BOND improving agent or Strong Repair 84 and Fine Repair 83 and in sufficient numbers (4/100m²).
Rain gutters
It is necessary to provide clean and in good working order rain gutters. Particular attention is drawn to the fact that water should be directed towards the gutters.
Perimeter expansion joint
In areas where the surface is adjoining to vertical features (barriers, staircase walls, terrace walls etc), an expansion joint should be provided, size 1Χ1cm. For surfaces >90m², a supplementary intermediate expansion joint is necessary, size 1Χ1cm as well.
Application temperature conditions
The CLIMA ROOF system is applied at ambient temperature >5ºC and >35ºC and relative humidity <65%.
We do not recommend system installation when rain, strong wind or similar adverse conditions are anticipated.
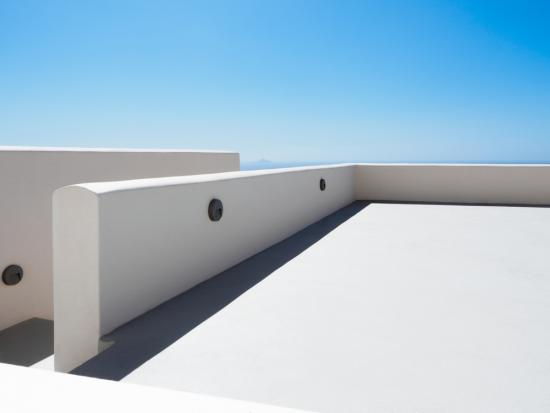
PARAPET
A necessary condition is that the system is encased for stability and to create a sealed basin.
Hence, the development of a parapet, where it is not existent, is a significant aspect. The height thereof is dependent upon the overall thickness of the system +15cm.
Condition of substrate
The substrate should be free from loose material, dust or grease and the like. It should be perfectly flat, with adequate runoff gradients.
It is recommended to remove loose volumes by water blasting.
The repair method is described in the runoff gradients; a similar method is applied to vertical features (parapets etc).
The following table indicates common cases of substrates and the respective remedies or repair proposals:
B. APPLICATION
1. Substrate preparation (ref. Table Ι)
The surface should be thoroughly cleaned from loose matter, dust, greasy substances etc. to ensure proper adhesion. The condition of the new substrate should be tested again.
In case the exposed substrate is particularly loose, it is recommended to remove loose portions by water blasting. Furthermore, if widespread irregularities are observed on the exposed substrate (e.g. potholes or recesses) then, before the commencement of application of the Clima Roof System, we recommend the application of a levelling course (cementitious screed strengthened by Powder Bond mortar improver or Fine Repair mortar, class R3, or Strong Repair 84 class R4, depending on the depth of the intended repair).
Local recesses can be smoothed by Fine Repair class R3 mortar or Strong Repair 84 class R4. The same procedure should be applied to vertical features.
Table I: Preparation – Repair Method per Case
Substrate type | Condition | Preparation – Repair method |
Concrete slab or cement mortar | Fair | Wash with soapy water and make sure to wet the substrate before application of KF-1 adhesive mortar (else the water in KF- 1 will be dehydrated). In case a crust has formed in the cement mortar, this should be roughed by water blasting. |
Concrete slab or cement mortar | Poor | As this substrate started to erode (loss of consistency), it necessarily needs primer with acrylic resin Powderbond (at a ratio of 1:3 or 1:4 material to water). In case steel reinforcements are exposed or the transfer of aggregates is excessive, repairs are necessary. |
Mosaic floor (polished or not) |
| Thorough washing with soapy water /detergent and then scrubbing. In case of highly polished floors, roughing could be necessary (using a stone floor machine or hand float). Apply primer using transparent Epoxy Aqua Floor Primer, in case the surface is not porous; otherwise, the repair mortar is directly applied [Fine Repair (R3) or Strong Repair (R4)] |
Tiles | Primer should be generally applied to cement-based shiny surfaces as well as ceramic tiles. | |
Pavement slabs | Remove moss and loose materials by manual cleaning. Application of Powderbond primer with contractor grade acrylic resin (material to water ratio 1:3 or 1:4). | |
Old bitumen waterproofing layer (tar paper or tar spraying) | Fair | Application of Powderbond primer acrylic resin (material to water ratio 1:3 or 1:4). |
Old bitumen waterproofing layer (tar paper or tar spraying) | Poor | Full stripping. Cleaning and application of Powderbond primer with acrylic resin (material to water ratio 1:3 or 1:4). |
Old waterproofing liquid membrane (acrylic or polyurethane based) | Fair | Scrubbing, washing and drying. |
Old waterproofing liquid membrane (acrylic or polyurethane based) | Poor | Full stripping. Cleaning and application of Powderbond primer with acrylic resin (material to water ratio 1:3 or 1:4). |
Metal substrate | Application of primer, product Epoxy Aqua Floor Primer. | |
Aerated concrete or other concrete used in runoff gradients | Application of Powderbond primer with acrylic resin (material to water ratio 1:3 or 1:4). | |
Tar paper with aluminium foil backing | Application of primer, product Epoxy Aqua Floor Primer. | |
Tar paper with stone chip | Application of Powderbond primer with acrylic resin (material to water ratio 1:3 or 1:4). |
In case of substrates other than those listed in the above Table, please contact the KRAFT Technical Department for proposals regarding application of suitable adhesion primer, before ClimaRoof® KF-1 is spread.
2. Adhesion / leveling & thermal insulation coat
Mix preparation is performed using low-speed mixer. Pour 4,2 to 4,5 kg water in a suitable empty container and slowly add Clima Roof KF-1 while stirring. Keep stirring for at least 3-4 minutes.
When the mix is homogenous and free from lumps, it will be ready for use. Wait 5 minutes and stir again for 1 minute. Mix workability is 20 minutes at 25oC. After the mix is ready, it is prohibited to add more water to regulate mortar workability, as this will both compromise strength and increase shrinkage.
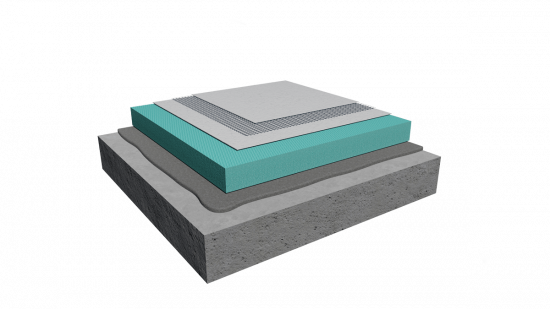
Provided that the substrate is prepared according to the instruction of Article 1, spread a small mix quantity on the substrate; this should be sufficient to cover one or two extruded polystyrene boards. Then use a “hard” metal spatter to spread and level Clima Roof KF-1, application thickness is indicatively 10-20mm. While the mix remains damp, apply the extruded polystyrene thermal insulation boards XPS GF Etics, in such a manner that the entire underside of the boards is spread with Clima Roof KF-1, without air being entrapped.
The crossed joint method is applied for laying the XPS GF Etics extruded polystyrene thermal insulation boards. In case runoff gradients should be formed by installing Clima Roof KF-XPS INCLINE sloping boards on the first course of XPS GF Etics level boards, then these are placed through the crossed joint method. Next, a board flatness check is carried out and also the integrity of terrace gradients is checked. The same procedure continues until complete coverage of the terrace with Clima Roof KF-1 and XPS GF Etics pieces.
Generally, ClimaRoof® KF-1 consumption is 1 bag per 3 – 4 thermal insulation boards. In case higher consumption is observed, this indicates an especially uneven substrate and possibly, other thickness of thermal insulation materials should be selected or the thickness of ClimaRoof® KF-1 needs to be regulated (4cm maximum thickness). The required material consumption is 1.5kg/mm/m². Mix drying is relatively quick, 2 to 24 hours, depending on temperature and application thickness. Application works can be resumed as soon as boards are walkable without affecting their flatness.
Full material curing requires at least 14 days, depending on the waterproofing system. In case runoff gradients are implemented by ClimaRoof® KF-XPS INCLINE boards, the even boards of the initial course are always placed with their longitudinal direction towards the gutters (with thickness increasing by 1 cm per 1m-long board) and precisely on these, the ClimaRoof® KFXPS INCLINE will be cemented in the following, to render a uniform flat surface with 1 % gradient towards the gutters.
The ClimaRoof® KF-XPS INCLINE boards will be affixed on the levelled boards (or between two levelled boards) using ClimaRoof® KF-1.
3. Creation of expansion joint at the convergence of the floor with vertical or intermediate features
Laying of XPS GF Etics expanded polystyrene boards is carried out up to 1-2cm before vertical features. The void between the extruded polystyrene and the vertical feature in question will be filled, either by polyethylene foam in suitable thickness, at a 1cm level below the extruded polystyrene level, or by expanded polystyrene board in suitable thickness, at a 1cm level below the extruded polystyrene level.
The 1cm depth clearance between the extruded polystyrene and the expanded polystyrene, will be filled by JOINT SMP 30, solvent-free, adhesive mastic sealant.
4. Filling XPS GF Etics board joints
Filling of board joints
Filling the XPS board joints is carried out by applying extra low-expansion polyurethane foam spray (Glue Foam 52, by KRAFT Paints). When the foam is cured, then the surface is levelled by cutting off the excess foam material. After that, a thin layer of ClimaRoof KF-1 is applied on the board joints, using a metal spatula, to prevent water infiltration.
5. Groove formations
Use fine-grained, concrete repairing mortar Easy Repair 80, by KRAFT Paints, or other concrete repairing products to create a perimeter groove formation to assist with water drainage at the interface between the substrate and the vertical features of the structure (e.g. barrier, stairwell head space etc) as described in article 4. The groove formation should be triangular shaped, with side lengths of about 5-6 cm.
6. Crack treatment course and second waterproofing course
Liberal spreading of Clima Roof Net anti-alkali glass mesh with overlapping courses of 10cm and fundamental encasing in the still fresh levelling gutter. The reinforcement should be raised above all vertical features by at least 15cm.
The CLIMA Roof Net mesh to be spread on the substrate will terminate at the barrier without folding. A second part of mesh adhesive, at least 30cm thick, will cover the vertical part (barrier etc) by 15cm (mesh splicing) and will fold by overlapping the horizontal part. CLIMA Roof KF-2 + CLIMA Roof KF-2 Latex mix preparation is the same as described in article 4.
The next step involves the full spreading of CLIMA Roof KF-2 + CLIMA Roof KF-2 Latex on the surface of already installed XPS GF Etics thermal insulating boards and encasing of the CLIMA Roof Net anti-alkali glass mesh, using flexible metal spatter or floor spreader blade, handle operated or without handle. Initial waterproofing course thickness shall be 2 -3 mm.
7. Crack treatment & waterproofing of vertical features
Waterproofing of vertical features (e.g. Barrier, stairwell head space etc) is performed using 2-component, cementitious waterproofing slurry Hydroguard Elastic White mix preparation is performed using low-speed mixer. Pour Hydroguard Elastic in a suitable empty container and slowly add Hydroguard One 40 while stirring.
Stir thoroughly for at least 3-4 minutes. When the mix is homogeneous and free from lumps, it will be ready for use. Apply 2-3 courses of Hydroguard One 40 + Hydroguard Elastic mix on all vertical surfaces, to a height of at least 20 cm, at the same time reinforce by applying the ClimaRoof® KF-Net glass mesh. Each of the subsequent layers should be applied after drying of the underlying layer (at least 5 hours drying, subject to weather conditions).
8. Second waterproofing layer
A second waterproofing layer will follow, by applying ClimaRoof® KF-2, crosswise with the first layer on the entire surface of the terrace. The second waterproofing layer thickness shall be approximately 2mm.
9. Local waterproofing – sealing
At locations where thermal insulation is discontinued (e.g. Solar panel or air-conditioning unit mountings, stand-by sockets etc), the following process should be applied: Extruded polystyrene - XPS GF Etics, reaches up to 1-2cm below each installation. The bottom of the resulting gap, should be filled with extra-low expansion polyurethane foam (Glue Foam 52, by KRAFT Paints). After that, the application of polyurethane sealing mastic follows, Joint PU 25 or Joint SMP 30 by KRAFT Paints.
10. Expansion joints
On terraces whose surface exceeds 80m², we recommend fabrication of intermediate expansion joints at 40m² intervals as follows:
Firstly, the joint is marked out with masking tape; the material between them is cut and the spot area is carefully cleaned. We propose the joint is made 1cm wide and 1cm deep. Then a foam joint bead of similar diameter will be applied. It will be then sealed with PU JOINT 25 flexible polyurethane mastic. The mastic can be finished off with your finger regularly immersed in soap water. After finishing the joint, masking tape is removed and the aesthetic texture is improved where necessary.
11. Other construction details
At the gutter: make a bevel cut of the FIBRANxps board with 45 degrees slant and and proceed with waterproofing ClimaRoof® KF-2 reinforced with ClimaRoof® KF-Net mesh meticulously the glass mesh, before application of the final CLIMA Roof KF-2 + CLIMA Roof KF-2 Latex mix.
Also, to form a ramp at the entry to the terrace, make a bevel cut to the thermal insulation board, and proceed with waterproofing ClimaRoof® KF-2 reinforced with ClimaRoof® KF-Net mesh.


